Chromatic Reverberations: Building Data-Driven Color Changing Displays
There's a peculiar magic in witnessing something mechanical breathe. I remember, as a child, my grandfather would unveil his antique accordion for special occasions. It wasn’t merely an instrument; it was a time machine. The bellows pulsed with each push and pull, a rhythmic sighing that seemed to whisper tales of distant ballrooms and forgotten melodies. The polished wood gleamed under the lamplight, and the intricate keys—each a tiny, precisely engineered piece—felt weighty and significant in my small hands. The sounds weren't perfect, not like the pristine recordings you hear today. They were rough, imbued with the character of years spent in the hands of a passionate, imperfect player. That imperfection, that palpable history, was the essence of its beauty.
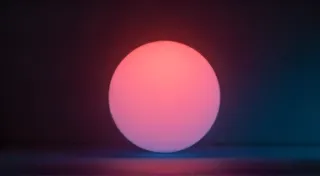
That feeling – that sense of responsive life – is what I try to recreate when I build data-driven color changing displays. It’s about taking something inanimate, something static, and imbuing it with a semblance of feeling, a visual echo of the world around it. We’re moving beyond simple LED light strips, embracing the opportunity to connect the digital realm with the tangible, creating something both aesthetically pleasing and intellectually stimulating. And in the heart of this project lies a surprising overlap with the dedication to craft and restoration that my grandfather embodied. It's a process that, in many ways, reflects the intricate dance of components that we often delve into when building more advanced systems – something you might explore further in articles about reactive lighting systems.

The Marriage of Craft and Code
Consider the accordion’s internal workings. Each reed is painstakingly shaped and tuned, requiring immense skill and patience. Minute adjustments in their construction dramatically impact the final sound. A misplaced rivet, a slightly warped reed – it all contributes to the instrument’s unique voice. Building these displays requires a similar degree of focused attention. It's not just about wiring LEDs; it's about understanding how different colors interact, how data ranges map to color palettes, and how to create a visual experience that is both informative and emotionally resonant. The meticulous attention to detail, the problem-solving inherent in both crafts, truly mirrors the iterative process of building complex electronic systems.
The core technology we're using – Arduino or Raspberry Pi – are remarkably accessible. Arduino, with its simplicity and vast community support, is perfect for beginners. Raspberry Pi, with its greater processing power, allows for more complex data handling and network integration. In this project, we’re leveraging these platforms to fetch data – perhaps weather conditions from a public API, or real-time stock market fluctuations – and translate that data into a dynamic color scheme for a series of addressable LEDs. The key lies in the mapping function: how do you represent a temperature of 30°C with a specific shade of blue? How do you convey market volatility with a pulsating red?
Understanding the Hardware
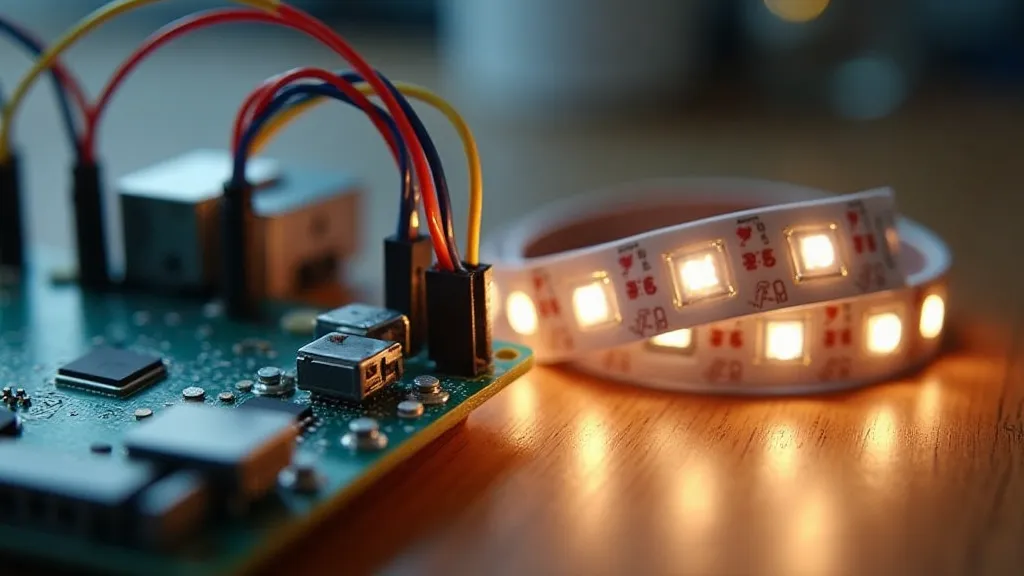
The heart of our display is the LED strip. Addressable LEDs, like the popular WS2812B, are individually controllable, allowing for intricate patterns and animations. They're relatively inexpensive and widely available. You'll also need a microcontroller (Arduino or Raspberry Pi), a power supply, and some basic wiring components. The power supply needs to be appropriately sized for the number of LEDs you’re using – insufficient power can lead to dimming or even damage. Careful consideration of power requirements, shielding, and signal integrity are all crucial aspects of successful system design, mirroring the intricacies found in environments dealing with electromagnetic fields – a topic explored in detecting and analyzing electromagnetic fields.
Connecting everything is straightforward. The data signal from the microcontroller connects to the LED strip’s data input. The power supply connects to both the LED strip and the microcontroller, providing them with the necessary voltage. Remember to use appropriate resistors to protect the microcontroller from excessive current draw. Just as a skilled accordion repairman meticulously cleans and lubricates each component, ensuring smooth operation, we must ensure the electrical connections are secure and well-insulated.
Data Acquisition and Mapping
The real magic happens in the code. We need to establish a connection to a data source. For example, if we want the display to reflect the current temperature, we can use a weather API like OpenWeatherMap. The code will send a request to the API, receive the data, and then parse the temperature value. This process mirrors the careful restoration of an antique accordion – painstakingly cleaning each reed, adjusting its tension, and ensuring it vibrates correctly to produce the desired tone. This data often requires careful parsing and transformation, ensuring its suitability for the target application.
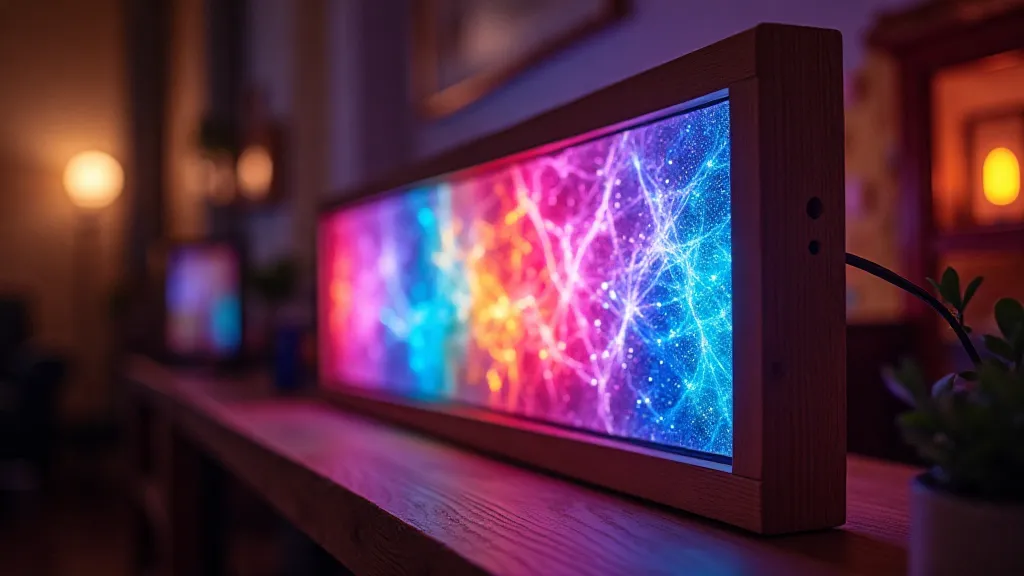
Once we have the data, we need to map it to a color range. A simple linear mapping is a good starting point. For example, temperatures between 0°C and 10°C could be mapped to shades of blue, temperatures between 11°C and 25°C could be mapped to shades of green, and temperatures above 26°C could be mapped to shades of red. More sophisticated mapping functions – using logarithmic or exponential curves – can provide a more nuanced representation of the data. The flexibility and expandability of these platforms also allow for complex network integrations, crucial for projects dealing with wireless data transmission – an area explored in exploring the potential of low-power wireless networks.
Beyond Temperature: Expanding Possibilities
The applications are virtually limitless. Imagine a display that visualizes stock market volatility, with reds indicating downturns and greens signifying gains. Or a display that reflects the current air quality, with colors shifting based on the levels of pollutants. A display reacting to social media sentiment could even subtly shift its color palette based on the overall mood of online conversations.
The principles behind restoring an old accordion—understanding its limitations, appreciating its history, and preserving its essence—are surprisingly applicable here. We’re not simply building a light show; we're creating a bridge between the digital and physical world, imbuing inanimate objects with a sense of responsive life. There’s a quiet satisfaction in knowing that your creation – like my grandfather’s accordion – can evoke emotion, tell a story, and connect people to something larger than themselves. And, of course, powering these devices requires careful planning, mirroring the considerations involved in establishing a smart home ecosystem - an area where Raspberry Pi: Seeds of Automation – Cultivating Smart Home Ecosystems truly shines.
Troubleshooting and Next Steps
Common issues include incorrect wiring, power supply problems, and code errors. Double-check your connections, ensure your power supply can handle the load, and carefully review your code for any logical errors. The Arduino IDE and Raspberry Pi’s command line offer helpful debugging tools. Don’t be afraid to experiment – the beauty of DIY electronics lies in the learning process. As with the meticulous repair of a treasured accordion, perseverance and attention to detail will lead to a rewarding outcome. Consider exploring advanced techniques like color calibration and dynamic range compression to further enhance the visual impact of your display. Learning about signal integrity and noise reduction can significantly improve reliability, especially in challenging environments. Furthermore, investigate different LED types and display configurations to unlock new creative possibilities. The world of electronics is vast and ever-evolving, offering endless opportunities for learning and innovation.